Sea Breeze Style: How to Make Dark Furniture Look Beachy

It’s a warm, sunny afternoon. You’re sipping on a cool drink, lounging comfortably on a plush, light-colored sofa that exudes an effortless beachy vibe. The furniture around you is a symphony of soft blues, whites, and sandy hues, transporting you to a serene coastal setting right within your home. Sounds dreamy, doesn’t it? This article will guide you on how to make dark furniture look beachy, turning your home into your seaside retreat.
Yes, you read that right. The appeal of this transformation lies not just in the refreshing aesthetic change but also in the opportunity to breathe new life into your old, dark furniture pieces. So, buckle up and get ready to ride the wave to a stylish, coastal living room furniture ideas.
Characteristics of Beachy Furniture

Beachy furniture is more than a simple interior design aesthetic; it embodies a lifestyle that values relaxation, simplicity, and a close connection with nature. As you delve into beachy furniture, you’ll discover distinctive characteristics that set it apart from other styles.
At first glance, beachy furniture might seem deceptively simple. However, upon closer inspection, you’ll find a rich tapestry of design elements working together to create a harmonious, relaxed vibe. One defining characteristic is its light, airy feel. Beachy furniture often features open designs with plenty of space underneath, giving rooms a spacious and breezy atmosphere.
Another key trait is the use of raw materials. Think of weathered woods reminiscent of driftwood washed up on the shore, wicker and rattan that mirror the texture of beach grasses, or jute rugs echoing the roughness of sandy beaches. These materials lend a rustic charm to your coastal interiors and establish a tangible link to nature, reinforcing the coastal theme.
Finally, beachy furniture is all about comfort. Plush, oversized sofas, comfy armchairs, and cozy throws invite you to kick back and relax, embracing the laid-back beach lifestyle.
Importance of Color, Texture, and Material in Achieving A Beachy Look
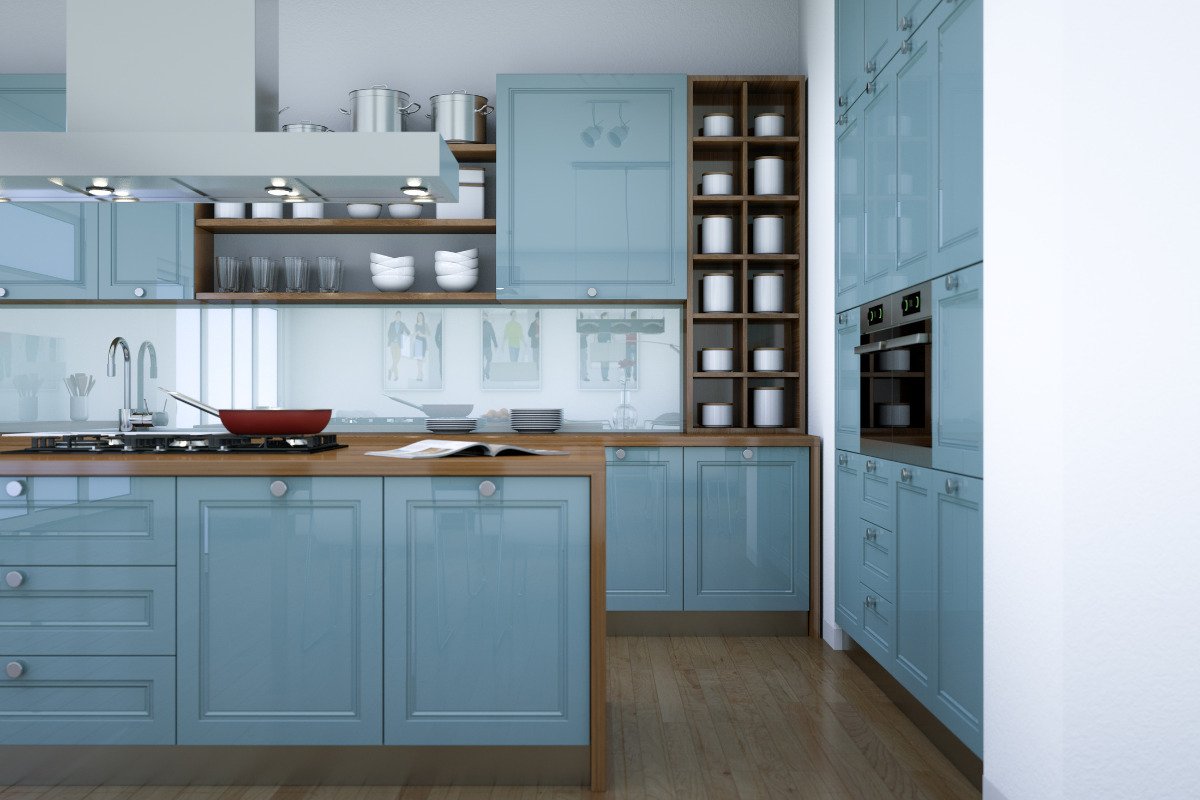
When achieving a beachy look, color, texture, and material play pivotal roles, let’s start with color. The beachy palette draws inspiration from the seaside, featuring soft whites, sandy beiges, and a range of blues, from the palest sky blue to the deep navy of the ocean depths. These hues create a serene, calming atmosphere reminiscent of gazing at the sea from a sandy beach.
Texture, too, is key in beachy design. Rough, weathered wood brings to mind the rugged beauty of driftwood, while smooth, polished surfaces evoke feelings of water-washed stones. Fabrics also play a part here, with soft, fluffy textiles offering a contrast to the harder materials and adding a sense of coziness.
Material choices further enhance the beachy vibe. Natural materials are a quintessential part of beachy furniture, reinforcing the connection to nature at this style’s heart. Weathered woods, wicker, rattan, jute, seashells, and coral can all find a place in beachy design, each adding its unique touch to the overall aesthetic.
Prepare the Materials You Need
Embarking on your furniture transformation journey requires a bit of preparation. Like a skilled artist with a palette of colors, you’ll need tools and materials to bring your beachy vision to life. Here’s a comprehensive list to help you get started:
- Furniture Piece: This could be any piece of dark furniture you wish to transform – a coffee table, a bookshelf, a chair, or even a full-sized cabinet. The choice is yours!
- Sandpaper: A crucial tool for preparing your furniture. You’ll need coarse-grit sandpaper (around 80-100 grit) for the initial sanding and fine-grit sandpaper (around 220 grit) to smooth the surface before painting.
- Primer: This will provide a good base for your paint, helping it adhere better to the furniture and enhancing the durability of your finish.
- Paint: Choose acrylic or latex paint in your desired beachy hues. You might want to pick up a few shades – whites, beiges, and blues – to create depth and interest.
- Paint Brushes: A variety of sizes would be handy. Larger brushes for broad strokes and smaller ones for detailing and hard-to-reach areas.
- Sealant: A clear, water-based sealant will protect your painted furniture from wear and tear, keeping it looking fresh and lovely for longer.
- Painter’s Tape: This will be useful for marking off areas you don’t want to paint.
- Drop Cloth: To protect your floors from any accidental paint drips.
- Screwdriver: If your furniture has handles or hinges, you’ll need to remove them before painting.
- Clean Cloth and Mild Soap: For cleaning your furniture before you start working on it.
How to Make Dark Furniture Look Beachy

Now that you have all the necessary materials, it’s time to get creative and transform your dark furniture into stunning beachy pieces. Follow these simple steps, and before you know it, you’ll be soaking in the coastal vibes right in your own home.
➡Step 1: Preparing Your Furniture
Every great journey begins with a single step, and our beachy makeover is no exception. Preparing your furniture is the first step in our process – an essential stage in laying the foundation for all the work.
Start by choosing the piece of dark furniture you wish to transform. It could be anything from a beloved but outdated coffee table to a sturdy bookshelf that’s seen better days. Once you’ve chosen, it’s time to roll up your sleeves and get started.
Clear a workspace in a well-ventilated area, laying down a drop cloth to protect your floors from any mess. Remove any hardware from your furniture, like knobs or hinges, using a screwdriver. Then, clean your chosen piece well with a clean cloth and mild soap. It will remove any dust or grime interfering with the sanding and painting.
➡Step 2: Sanding the Furniture
With your furniture prepped, it’s time to move on to sanding. This step is crucial as it helps create a surface to which your paint can adhere effectively.
Start with coarse-grit sandpaper, around 80-100 grit, to roughen the surface and remove any existing finish. Use even, back-and-forth strokes following the grain of the wood furniture. Don’t rush this step; patience is key to achieving a smooth, even surface.
Once you’ve sanded the entire piece, wipe it down with a damp cloth to remove dust. Then, repeat the process with fine-grit sandpaper, around 220 grit, to smooth out any rough spots and prepare the surface for painting.
Sanding can be a bit of a workout but think of it as the tide wearing down a piece of driftwood. Each stroke of the sandpaper brings you one step closer to your beachy transformation.
➡Step 3: Applying Primer
Now that your furniture is sanded and smooth, it’s time to lay the groundwork for your new beachy color scheme by applying primer.
Primer serves multiple purposes. It helps your paint adhere to the furniture better, enhances the durability of your finish, and ensures that the true colors of your paint show through.
Using a clean brush, apply a coat of primer to your furniture, covering all areas. If your furniture has intricate details or hard-to-reach areas, use a smaller brush to ensure full coverage.
Once you’ve applied the primer, allow it to dry thoroughly. It could take a few hours, so be patient. It’s a good time to take a break, perhaps with a refreshing drink and dreams of your soon-to-be beachy furniture.
With these steps, you’re well on transforming your dark furniture into a piece that exudes an effortless, coastal charm.
➡Step 4: Choosing the Right Paint Colors
The selection of paint colors is a hefty decision in your beachy transformation journey. It’s like choosing the soundtrack to a film; the right colors set the mood, create the atmosphere, and can even tell a story.
When it comes to beachy furniture, think of the hues you’d encounter on a blissful day at the beach. Soft whites and creams reminiscent of sun-bleached shells, varying shades of blue echoing the changing moods of the sea, sandy beiges that mirror the warm beach underfoot, and even muted greens reflecting coastal vegetation.
Don’t be afraid to mix and match different colors in your project. Maybe you want the main body of your piece to be a soft white but with drawers or shelves in a contrasting sea blue. The beauty of this process is that you’re in control and can create a piece that’s uniquely yours.
➡Step 5: Painting Techniques for a Beachy Look
With your colors chosen, it’s time to pick up your brush and start painting. But how you apply your paint can have just as much impact on the final look as the color itself.
For beachy furniture, aim for a finish that looks lived-in and slightly weathered, as though the salty sea air has kissed your piece. You can achieve this by using a dry-brush technique, where you dip your brush lightly in paint and then brush most of it off on a paper towel before applying it to the furniture. This results in a light, streaky finish that lets some of the wood underneath show through.
Alternatively, you can opt for a more solid finish by applying two or more coats of paint. Consider layering them for a more complex, textured look if you’re using multiple colors. Start with a base coat in one color, let it dry, and then apply a second coat in a different color. Once dry, lightly sand the piece to allow some base color to show through.
➡Step 6: Adding Distressed Effects
Distressing your furniture is like adding the final flourishes to a painting. It’s an opportunity to infuse your piece with character and charm, enhancing the beachy vibe.
To distress your furniture, take a piece of coarse-grit sandpaper and lightly sand areas that naturally show wear over time, such as edges, corners, and raised details. The goal is to make your piece look like it’s been lovingly used and weathered by time.
Remember, less is often more when it comes to distressing. A few well-placed marks can be more effective than an overly distressed piece. Remember that this is your creation – if you prefer a cleaner look, skip this step.
➡Step 7: Sealing Your Furniture
The final step in your transformation journey is sealing your furniture. It will protect your hard work from the rigors of daily use, ensuring your piece maintains its beachy charm for years to come.
Apply a clear, water-based sealant using a clean brush, covering all painted areas. Allow the sealant to dry according to the manufacturer’s instructions. Once it’s dry, your transformed furniture is ready to be admired and enjoyed!
Additional Tips and Tricks

Your furniture transformation journey doesn’t have to end with a fresh coat of paint and a layer of sealant. There are many ways to further enhance your piece’s beachy vibe, making it feel like a part of your coastal haven. Here are some suggestions to inspire you:
✅Decorative Elements: Consider adding some beach-themed decorative elements to your piece. It could be as simple as swapping out the old knobs or handles for ones shaped like starfish or seashells or as elaborate as stenciling a nautical design onto the drawers of a dresser.
✅Distressed Details: If you didn’t distress your furniture during the painting process, you can still add a touch of weathered charm with some distressed details. Try lightly sanding the edges of your piece or adding a few placed scratches or dents.
✅Decoupage: If you’re feeling particularly crafty, consider using a decoupage to add a coastal pattern or image to your piece. It could be anything from a vintage map of your favorite seaside town to a collage of beautiful shells or sea creatures.
✅Pairing with Suitable Modern Coastal Decor: Once your piece is complete, enhance its beachy vibe with the right modern coastal decor ideas. A beachy bookshelf could be adorned with a collection of seashells or beach glass, while a coastal coffee table would look lovely with a bowl of driftwood or a lantern filled with sand and candles.
✅Creating a Beachy Vignette: Consider creating a beachy vignette around your transformed piece. It could involve arranging related items – like a stack of beach reads, a hurricane vase filled with sand and seashells, or a framed photo of your favorite coastal scene – on or around your furniture.
✅Incorporating Natural Textures: Natural textures like jute, rattan, and weathered wood can enhance the beachy feel of your space. Add a jute rug under your beachy coffee table, or pair your transformed dresser with a rattan mirror.
Frequently Asked Questions
Q: What colors are typically used for a beachy look?
A: The color palette for a beachy look often includes soft whites and creams that are reminiscent of sun-bleached shells, various shades of blue to represent the sea, sandy beiges that mirror the warm beach, and muted greens inspired by coastal vegetation. These colors can be used individually or in combination to create a serene and relaxed beachy atmosphere.
Q: Can I make dark furniture look beachy without painting?
A: It’s possible to give dark furniture a beachy look without painting. You can achieve this by incorporating beach-themed accessories or coastal design décor around the furniture. For instance, drape a light-toned throw blanket or add sea-themed cushions on a dark sofa. You can also place coastal elements like shells, beach glass or a bowl of driftwood on a dark coffee table. Remember, balancing your dark furniture and the lighter, coastal-themed accessories is key.
Q: What type of paint is best for creating a beachy look?
A: Chalk paint or milk paint is ideal for a beachy look. These types of paint create a matte, textured finish that aligns well with the weathered, rustic feeling commonly associated with beach-themed, coastal style décor. They also lend themselves well to distressing techniques. However, you can also use regular latex or acrylic paint if you prefer a smoother finish. The choice of color is equally important. Opt for soft, muted shades that evoke the colors of the seaside, such as whites, beiges, blues, and greens.
Conclusion
Transforming your dark furniture into a beachy masterpiece is about more than just a fresh coat of paint. It’s about capturing the spirit of the coast – the serenity of a seaside sunset, the charm of a weathered piece of driftwood, and the joy of finding the perfect seashell. It’s about bringing a touch of that coastal magic into your home, creating a space where you can relax and dream of sandy shores and gentle waves whenever you like.
I hope this guide has inspired you to embark on your furniture transformation journey. Whether you’re a seasoned DIY enthusiast or a complete beginner, I’m confident you have what it takes to create a beautiful, beachy piece you’ll be proud to show off.
Now, I’d love to hear from you. Have you tried transforming your furniture? Do you have any tips or tricks to share? Or perhaps you have a question or need some advice? Whatever it is, feel free to leave a comment below. After all, we’re all on this creative journey together, so let’s learn from each other and celebrate our successes.


