Why Does My Vacuum Cleaner Smell Like Burning? Uncovering the Mysteries of Home Appliance Odors
You know the deal: you’ve got a house to keep clean, and your trusty vacuum cleaner is your go-to sidekick on this quest. But, what happens when your cleaning buddy suddenly starts emitting a weird, funky scent? You’re left wondering, “Why does my vacuum cleaner smell like burning?” Don’t stress – we’ve got your back.
In this blog, we’re diving deep into the world of vacuum cleaners to uncover the mystery behind that burning smell. From the whirring motors to those sneaky filters, we’re going to spill the tea on all the reasons that might be causing your vacuum to get a little, well, overheated. Plus, we’ll serve up some hot tips on how to prevent it from happening again and keep your cleaning game strong. So, if you’re ready to roll up your sleeves and tackle the burning question of the vacuum world, let’s get started!
Is It Normal For New Appliances To Smell Like Burning?
Totally, it’s kinda common for brand-new appliances to give off that burning-ish scent when you first fire ’em up. No worries, though – it’s usually just the leftover manufacturing stuff and parts heating up. That funky smell should chill out after you’ve used it for a few hours or gone through a couple of cycles. But, don’t confuse that with a super strong, nasty burning smell. If you’re dealing with that, shut it down, unplug it, and hit up the manufacturer or a tech whiz pronto to avoid any real problems or safety issues.
Common Appliances That Smell Like Burning When Newly Opened
Several common appliances might emit a burning smell when first opened or used. These can include:
1. Toasters and Toaster Ovens
Let’s start with toasters and toaster ovens. You know when you whip up some avocado toast for breakfast, but then you get hit with that funky smell? It’s all good; it’s likely just the toaster stretching its legs for the first time. The heating elements in these bad boys can give off a slightly charred scent during their maiden voyage. Don’t worry; it’s not your toast burning – it’s just the remnants from the manufacturing process getting all toasty and vaporizing.
2. Microwaves
Next up is the microwave. So, you’ve just moved into your new crib, and you’re ready to heat up some leftovers, and then BAM! A burning smell takes over your kitchen. Chill, it’s normal. Microwaves can produce that weird scent when you first crank ’em up. It’s like the microwave’s way of saying, “Hey, I’m new here!” That smell is usually just leftover stuff from when it was on the assembly line, and it should fade after a few uses. So nuke that leftover pizza and let your microwave get comfy in its new home.
3. Ovens and Stoves
Now, let’s talk ovens and stoves. You’re all set to whip up your first homemade pizza, but what’s that smell? It’s like a mini bonfire in your kitchen. Electric or gas, ovens and stoves can give off a bit of a stink the first time you fire ’em up. It’s usually oils and residues from the manufacturing process saying their last goodbye, sizzling away. Don’t stress; it’s a one-time thing. Soon your kitchen will smell like a pizzeria, not a barbecue pit.
4. Dishwashers
We’re moving to dishwashers now. You just bought that fancy dishwasher, and it smells like something’s on fire when it’s running. No worries, it’s just a friendly hello from the heating elements. They’re shaking off any leftover manufacturing leftovers, and it’s that burning smell you’re catching. Run a few cycles, and soon your dishes will be sparkling clean, and your kitchen will smell fresh as a daisy.
5. Washing Machines
Now, about washing machines. You throw your laundry in, hit start, and suddenly you’re hit with a whiff of something burning. It’s not your socks, promise. It’s the washing machine’s way of saying, “I’m new here, let me break in.” The motor and other machine parts can create that burning smell when they’re first being used. No biggie; it’s just like your machine’s version of a warm-up before the real deal.
6. Hair Dryers
Ladies and gents, let’s talk hair dryers. You just bought a brand new hair dryer that’s supposed to give you the luscious locks of your dreams. But when you turn it on, it’s like you’re at a barbecue joint. That’s a bit weird, right? Not really. New hair dryers often give off that burning scent when you first crank them up. It’s just the thing heating up for the first time. Use it a few times, and soon, your hair will be runway-ready, and your hair dryer will be odor-free.
7. Space Heaters
Alright, space heaters, you’re up. You’re trying to stay toasty during winter, and then it happens – a burning smell fills the room. What’s going on? It’s like your heater’s trying to roast marshmallows. The electric space heaters can create a bit of a stink when they’re fired up for the first time. It’s typically due to dust and other gunk burning off. Let it run for a while, and soon, you’ll be snug as a bug in a rug, with no funky odors to deal with.
8. Vacuum Cleaners
Last but not least, let’s chat about vacuum cleaners. You’ve got a new one, and you’re all set to tackle that messy room. But when you switch it on, it’s like you’re at a bonfire. No, it’s not a vacuum cleaner barbecue. It’s just the motor and dust making a stink as they get to work for the first time. Give it a few rounds, and you’ll have a spotless space without any of that burning smell to deal with.
But here’s the deal – if the smell sticks around or gets super intense, that’s a sign that something might be amiss. It’s time to unplug, turn off, and reach out to the manufacturer or a pro technician. Safety always comes first, fam, and it’s better to be safe than sorry.
Why Does A Vacuum Cleaner Smell Like Burning?
| Issue | Explanation | Solution |
| Overheating Motor | You’re on a cleaning spree, but your vacuum is getting too hot, causing its motor to emit that burning scent. | Give your vacuum a breather between sessions. If the problem persists, it’s time for a pro-check. |
| Clogged Filters or Airway | Your vacuum relies on smooth airflow, but clogged filters or airways hinder this, making the motor overheat and producing a burning odor. | Regularly clean filters and check for debris in the airway. |
| Belt Issues | The belt that drives the brush roller might be in bad shape, slipping, creating friction, and that familiar burning smell. | Inspect the belt and replace if necessary, following the manufacturer’s instructions. |
| Debris in the Brush Roller | Hair, strings, and other debris can wrap around the brush roller, causing it to struggle and heating up the motor. | Free the brush roller from debris to ensure it spins freely. |
| Worn or Damaged Parts | Over time, the vacuum’s components can wear out or become damaged, like motor bearings, leading to a burning smell during operation. | If you suspect worn parts, consult a technician for replacement. |
| Electrical Issues | In some cases, faulty electrical components or wiring within the vacuum can overheat and emit a burning odor. | For safety, immediately stop using the vacuum and seek professional help. |
When To Be Alarmed?
So, here’s the deal: when your brand-new vacuum cleaner starts emitting that burning smell, there are specific situations that should set off your alarm bells. If you’re still dealing with a seriously strong, in-your-face burning odor that doesn’t chill out even after a few initial uses, that’s your cue to be alarmed. A fresh vacuum might have a faint, “breaking-in” smell, but it should be temporary. If it doesn’t budge or actually gets worse with each use, that’s a red flag waving in your face.
Now, if that burning smell takes on the distinctive aroma of burning rubber, that’s not cool. It’s like your vacuum’s way of telling you that something’s up with its belt or some other components. That’s a situation that calls for action on your part.
But if things take a drastic turn and you start seeing smoke or there’s a strong acrid smell of something burning, that’s the ultimate alarm moment. In this case, don’t hesitate; immediately switch off the vacuum, unplug it, and keep your distance. Smoke could potentially signal a significant issue that’s not just about a smelly vacuum anymore. Safety comes first, and a fire is not on your to-do list.
When your vacuum starts making weird noises alongside the burning smell, like grinding, screeching, or banging, it’s another sign that things are not quite right. Unusual sounds are your vacuum’s way of saying, “Hey, we’ve got an issue here.” And finally, if you notice any hiccups with the electrical components, like sparks or flickering lights, it’s a reason to be concerned. Electrical problems can be super risky, and you should never ignore them. It’s not just about the smell anymore; it’s about safety.
Why Vacuum Cleaner Maintenance is a Big Deal
Vacuum cleaners are like the unsung heroes of our homes. They silently battle dust, dirt, and crumbs to keep our living spaces clean and cozy. But, here’s the catch: these heroes need a little love in return to stay in top-notch shape. Regular maintenance is the name of the game, and it’s crucial for their performance, longevity, and, let’s face it, for preventing any stinky surprises down the road. So, if you want your vacuum cleaner to keep rocking those cleaning missions, here’s what you need to do.
Step 1: Empty the Dustbin or Change the Bag (Bagless vs. Bagged)
Your vacuum’s dustbin or bag is its belly, and it can’t function properly when it’s too full. How often you empty or change it depends on your vacuum type.
- Bagless Vacuums: These have transparent dustbins, and you should empty them when they’re around two-thirds full. It’s like giving your vacuum some room to breathe and perform better. Don’t let it overstay its welcome; empty it before it gets packed like a music festival.
- Bagged Vacuums: For these, it’s all about changing the bag when it’s full. The manufacturer usually mentions how long a bag should last, so follow their recommendation. If you notice it’s puffing out dust or if suction power decreases, it’s time to switch it out.
Step 2: Clean or Replace Filters: The Filter Game
Filters are like the lungs of your vacuum, helping it breathe easily. Regular filter maintenance is crucial for preventing that burning smell and keeping your air fresh.
- Pre-Motor Filters: These filters catch the big stuff and protect the motor. They can usually be cleaned (if they’re washable) or replaced every 3-6 months. If they’re clogged, your vacuum will struggle.
- Post-Motor Filters: These capture smaller particles, keeping the air clean. Wash or replace them as the manufacturer suggests. Neglecting these filters can lead to dust circulating in your home, defeating the whole purpose of vacuuming.
Step 3: Inspect and Clean Brush Rollers: Time to Detangle
The brush roller is the one that goes to war with the dirt on your floors. It’s a real ninja, but it can get tangled up and lose its edge.
- Turn Off and Unplug: Safety first, always turn off and unplug your vacuum before you do any maintenance.
- Access the Brush Roller: Depending on your vacuum model, you might need to remove the brush roller or nozzle to access it.
- Detangle and Clean: Hair, strings, and debris can wrap around the roller. Use a pair of scissors to cut them away, and then clean the roller and its housing using a brush or a damp cloth.
Maintaining your brush roller is like keeping your ninja warrior in top shape – ready to tackle any mess without breaking a sweat.
Step 4: Clear Air Passages: Unblock the Flow
Vacuums work best when they can breathe easily. If something’s blocking the airflow, it’s like throwing obstacles in your cleaner’s path.
- Hose and Airway Check: Regularly inspect hoses, nozzles, and airways for clogs and debris. These are prime suspects for reduced suction.
- Clear Blockages: If you find a blockage, use a brush, a rod, or even a specialized vacuum attachment to remove the obstruction. This is like unclogging a traffic jam for your vacuum.
Step 5: Belts – The Unsung Heroes of Brush Rollers
Now, if your vacuum has a belt-driven brush roller, you need to watch out for it. Belts can stretch out and wear down, leading to issues like slipping and a burning smell.
- Inspect the Belt: Open up your vacuum and take a look at the belt. If it’s loose, frayed, or showing signs of wear and tear, it’s time to replace it.
- Follow Manufacturer’s Instructions: Belts come in various sizes, so be sure to follow the manufacturer’s recommendations for your specific vacuum model.
Belts might be low-key heroes, but when they’re in good shape, your vacuum’s cleaning performance shines.
Step 6: Clean the Vacuum Exterior: Looks Matter
Let’s not forget the aesthetics. A clean vacuum looks good and stays in better condition.
- Exterior Wipe-Down: Give the exterior a quick wipe with a damp cloth to remove dirt and dust. Don’t go all “Abrasive Annie” on it; harsh cleaning agents can damage the finish.
A clean exterior is like your vacuum’s way of saying, “I’m here to impress!”
Step 7: Inspect Wheels and Casters: Rollin’ Easy
Those wheels and casters might seem small, but they play a big role in your vacuum’s mobility. They’re the skaters of the vacuum world.
- Wheel Check: Regularly inspect the vacuum’s wheels and casters for damage or excessive wear.
- Replace If Needed: If you notice any damaged or worn-out wheels, don’t hesitate to replace them. It’s like giving your vacuum a set of fresh kicks for easy gliding.
Step 8: Maintain Attachments and Accessories: Keep ‘Em Organized
All those attachments and accessories are there for a reason – they make your cleaning life easier.
- Clean and Organize: Clean and store all your vacuum attachments and accessories in an organized manner. No one likes a messy toolkit, right?
- Regular Inspection: Periodically check if these attachments are in good working condition. If any are damaged or missing, consider replacing them.
Attachments can make your vacuum more versatile, so take good care of them.
Step 9: Lubricate Moving Parts (If Necessary): The Smooth Operator
Some vacuum models might have moving parts that require a little lubrication. Check your vacuum’s manual for guidance on lubrication.
- Follow Instructions: If your vacuum does need lubrication, be sure to follow the instructions in the manual.
Lubrication is like giving your vacuum a little spa treatment for smooth, squeak-free operation.
Step 10: Replace or Clean Exhaust Filters: Breathe Easy
If your vacuum has an exhaust filter, maintaining it ensures clean air while you clean.
- Clean or Replace: Regularly clean or replace the exhaust filter as per the manufacturer’s instructions.
Exhaust filters are like the vacuum’s lungs, making sure they breathe out clean air.
Step 11: Perform a Periodic Deep Clean: Show Some Love
Depending on your vacuum’s usage, it’s a good idea to perform a more thorough cleaning once or twice a year.
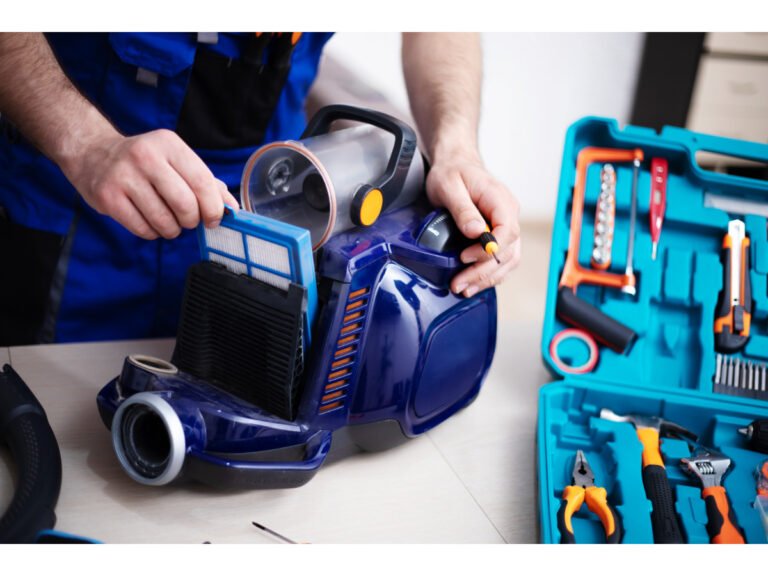
- Thorough Cleaning: This may involve disassembling your vacuum to clean internal components and remove accumulated dust and debris. It’s like giving your vacuum a spa day.
This deep clean keeps your vacuum in tip-top shape and ensures it’s ready for any cleaning challenge.
Step 12: Store Properly: Where You Keep It Matters
When your vacuum’s taking a break, where you store it matters.
- Cool and Dry Place: Store your vacuum in a cool, dry place to prevent any damage, like rust or mold growth.
Proper storage is like giving your vacuum a cozy spot to relax after a hard day’s work.
Final step: Schedule Professional Service (As Needed): When in Doubt, Call a Pro
If your vacuum starts acting up or exhibiting strange behaviors, don’t hesitate to call in a professional technician. They’re like the doctors for your vacuum.
- Persistent Issues: If your vacuum is dealing with persistent issues, unusual sounds, or electrical problems, consult a professional technician.
- Safety First: Remember, safety always comes first. If something doesn’t feel right, it’s better to be cautious and seek professional help.
Professional service is like calling in the experts when you’re not feeling your best. They’ll get your vacuum back in fighting shape.
Takeaway
So, there you have it! We’ve dived deep into the world of vacuum cleaners and demystified the whole “Why does my vacuum cleaner smell like burning?” situation. From overheating motors to clogged filters, we’ve spilled the tea on all the reasons behind that funky scent.
Remember, it’s all about proper maintenance and a little TLC for your cleaning sidekick. So, next time your vacuum starts emitting that mysterious burning smell, don’t panic. Check those filters, give the brush roller some love, and clear those air passages. And if things get too intense, don’t hesitate to call in the pros – they’re the superheroes of the vacuum world.
Your vacuum’s like your trusty steed on a cleaning quest, so take good care of it, and it’ll keep your space spick and span, no burning smells included. Stay fresh, stay clean, and keep that vacuum rollin’ without the drama!
To learn more about vacuum cleaners, just click here!


